MOCHI DONUTS | Matcha & Sweet Potato

Ingredients:

  • 2 cups sweet sticky rice flour (mochiko)
    • 1/4 c of this will be used in starter dough
  • 1/2 cup milk
    • + 2 tbsp milk for starter dough
  • 3 tbsp melted butter
  • 1/4 cup sugar
  • 1 egg
  • 1 tsp baking powder
  • 1/2-1 tbsp matcha green tea powder
  • 1 small purple Okinawan sweet potato


Instructions:

  1. To make the starter dough: Mix together 2 tbsp of milk and 1/4 cup of rice flour and microwave it for 30-45 seconds until it becomes slightly opaque. While researching how to make a basic mochi dough for this recipe, I came across several recipes that suggested to use a starter dough to act like the “gluten” that allows the dough to be elastic. 
  2. Combine the rest of the rice flour (1 3/4 cups), milk, butter, sugar, egg, and baking powder and mix until thoroughly incorporated. Add the starter dough and knead. If you have a mixer, use the dough hook to knead the mixture until you reach a soft, formed dough.
  3. If you plan to make plain doughnuts, roll the dough out flat and use round cutters to make desired doughnut shapes, or as I did in the video, divide into logs and manually form the doughnut shapes.
  4. To make different flavors, divide the dough accordingly.
    1. Matcha Flavor: Knead in 1/2 to 1 tbsp matcha green tea powder to a portion of the dough until combined.
    2. Sweet Potato: Mash sweet potato, add splash of milk and knead in portion of dough until combined.
  5. Canola oil or any vegetable oil. If you use a wide pan like I did, the oil should be about 1 inch. The smaller the pan, the less oil you need to heat up. So if you’re making a small batch, use a smaller pan instead. Fry the doughnuts and enjoy!
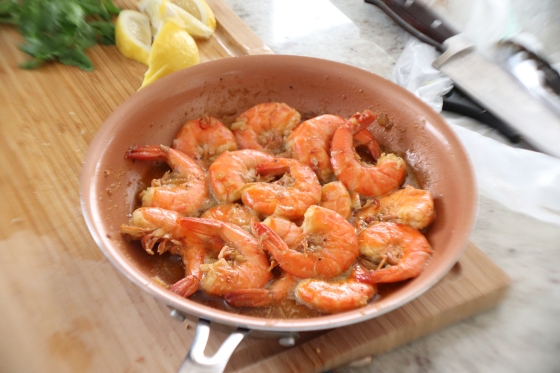
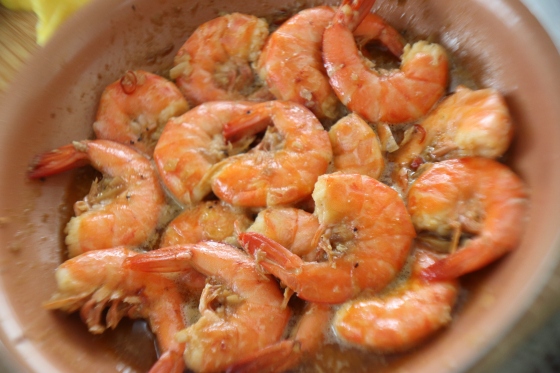
Hawaiian Garlic Butter Shrimp Recipe

IMG_0122

Wow! I haven’t been on this site in over 4 years! The feeling of nostalgia is definitely kicking in as I read my old posts and recipes. I even smiled reading my bio because it’s been a long time since and so many things have changed. I was surprised I even remembered my password logging on here, ha!

What’s new? I’ve recently started a Youtube cooking channel as a hobby and I wanted to link it back to this website, where you could say it all began. I will post the full recipes to my videos on here.  I’ve only made one so far, and  as the title suggests– Easy HAWAIIAN GARLIC BUTTER SHRIMP is definitely worth a try.

If you’re from Hawaii, you’ll know how long the lines get at Giovanni’s and Romy’s for them garlic shrimp. It’s one of those dishes that I honestly crave every month so I decided to try and create my version of it, which I will share below!

IMG_0123.JPG

Ingredients:

  • 2 tbsp olive oil
  • 2 tbsp unsalted butter
  • 1 lb.  shrimp, cleaned and deveined. Head-on fresh shrimp will work as well.
  • 6 large garlic cloves, minced.
  • 1/2 tsp paprika
  • 1 lemon (juice)
  • 1/2 cup shrimp stock (from boiled shrimp heads) or opt. chicken stock/ splash of white wine. 
  • Garlic salt, pepper to taste

Optional: chili pepper flakes, chopped parsley for garnish


Instructions:

  1. Wash shrimp with cold water thoroughly, clean, and devein. Remove the shrimp head by twisting at the base and then set aside in a sauce pan. With scissors, cut along the spine and remove intestinal tract with a toothpick or your fingers.
  2. Boil shrimp heads with 3/4 cups of water on high heat until liquid is reduced by half. Skip steps 1 & 2 if the shrimp is already de-shelled and cleaned.
  3. Heat pan to medium and saute olive oil and garlic until fragrant and slightly golden. Add butter next.
  4. Add the shrimp, garlic salt, pepper, paprika. Reduce heat to low so that shrimp will not overcook.
  5. Pour reduced shrimp stock and mix together. You may have to remove the shrimp if the sauce is not to desired consistency because shrimp cooks quickly.
  6. Let the sauce thicken and reduce, add lemon and salt to taste. Transfer the shrimp back to the pan, coat, and serve.


*If you did not use shrimp heads to make stock, a splash of white wine or chicken stock can be substituted.

That’s it! What I love about cooking using this method is that the garlic really cooks down, caramelizes, and almost becomes the sauce. That, mixed with butter is truly so delicious!

**In the video, I added chopped chili peppers and it was so spicy! ABORT ABORT on the chili! If you like it spicy, add some sriracha instead! 🙂